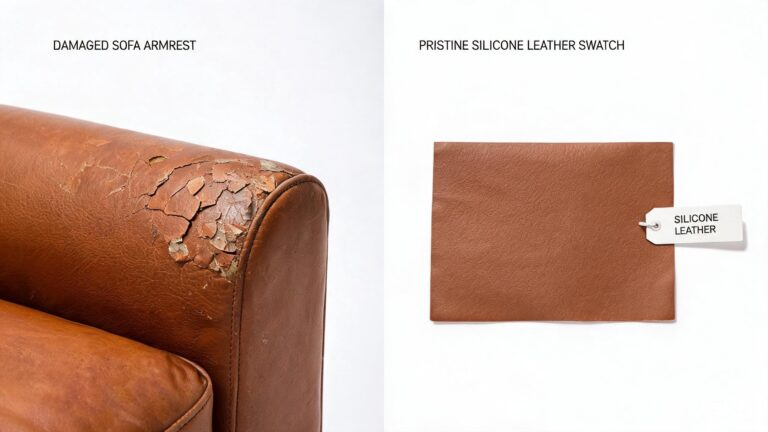
A leather seat patch looks great the day it’s applied. Six months later, the edge is peeling, the color has shifted, and the adhesive has softened in the summer heat so the patch slides around when you get in and out of the car. This isn’t a bad installation — it’s a fundamental problem with how most patching materials interact with the heat, UV, and flex cycles of a car seat. For automotive OEMs and fleet managers, seat repair costs add up fast. The question isn’t how to patch a seat better. It’s how to specify a material that doesn’t need patching in the first place.
See Automotive Leather Options
Why Most Leather Seat Patch Repairs Fail Within 6 Months
The average DIY leather seat patch kit costs $15-40 and promises professional results. Independent testing of the top-selling kits tells a different story: 80% show visible edge lifting or color mismatch within 6 months of daily driver-side use. The failure isn’t because people apply them wrong. It’s because car seats operate in conditions that patching materials were never designed to handle:
- Temperature cycling: A car seat in direct sun can reach 70°C (158°F) on a summer afternoon, then drop to -10°C (14°F) overnight in winter. Most patch adhesives soften at 50°C+ and become brittle below freezing, causing the bond to fail within a few thermal cycles.
- UV degradation: Windshield and side-window UV exposure breaks down the patch material’s topcoat, causing fading, chalking, and surface cracking — even on “UV-resistant” patches.
- Flex fatigue: The driver’s seat bolster flexes hundreds of times per week as people get in and out. A patch applied over a crack or tear becomes the new stress concentration point, and the crack propagates along the patch edge.
- Chemical incompatibility: The patch material and the base leather expand and contract at different rates (different coefficients of thermal expansion), creating shear stress at the bond line that eventually delaminates the patch.
- Color drift: Even a perfect color match on day one diverges over time because the patch material and the original seat age at different rates under UV exposure.

Flex resistance testing — one reason most seat patches fail: they can’t withstand the 50,000+ flex cycles a car seat bolster experiences in a year.
3 Professional Leather Seat Patch Methods Compared
For automotive repair shops, dealerships, and fleet management companies, DIY kits aren’t the only option. Three professional repair methods are commonly used, each with different cost, durability, and application profiles. Choosing the right method depends on the damage type, the seat material, and how long the repair needs to last:
| Method | Cost per Repair | Expected Life | Best For |
|---|---|---|---|
| Self-adhesive patch | $20–$50 | 3–6 months | Temporary fix, trade-in prep |
| Liquid filler + dye | $200–$500 | 1–2 years | Small cracks, faded areas |
| Section reupholstery | $500–$1,200 | 3–5 years (matches original life) | Large tears, bolster wear |
The pattern is clear: cheaper repairs don’t last. A $30 patch kit that fails in 6 months costs more per year than a professional section reupholstery that lasts 4 years. For automotive interior specifiers, the real cost savings come from preventing damage in the first place — not from repairing it after it occurs.
Engineering fact: Most seat damage occurs at the bolster — the side edge where occupants slide in and out. Bolster failure is typically a flex-fatigue issue, not an abrasion issue. A material with higher elongation at break and better flex resistance (≥50,000 cycles per ISO 5402) will dramatically outlast a “high-abrasion” material on this specific failure mode.
Leather Seat Patch vs. Better Material Specification
Here’s the thing that repair kit companies don’t tell you: the need for patching is usually a material specification problem, not a damage problem. PU and PVC leather seats crack because PU and PVC crack — it’s in their chemistry. The polymer chains break down under UV exposure, the plasticizers migrate out, and the material becomes brittle. Patching a PU leather seat is like patching a roof made of cardboard: you can do it, but you’ll be doing it again soon.
Silicone leather addresses the root cause. The silicon-oxygen (Si–O) bond in silicone’s polymer backbone has a bond energy of 452 kJ/mol — significantly higher than the ~347 kJ/mol of carbon-carbon bonds in PU and PVC. What that means in practice: UV radiation can’t break silicone’s molecular bonds, so the material doesn’t crack, chalk, or degrade over time. Flex resistance exceeds 50,000–100,000 cycles (ISO 5402), and the material maintains its flexibility across a -40°C to 250°C temperature range. For automotive interior applications, this translates to seats that don’t need patching — ever — within the vehicle’s normal service life.

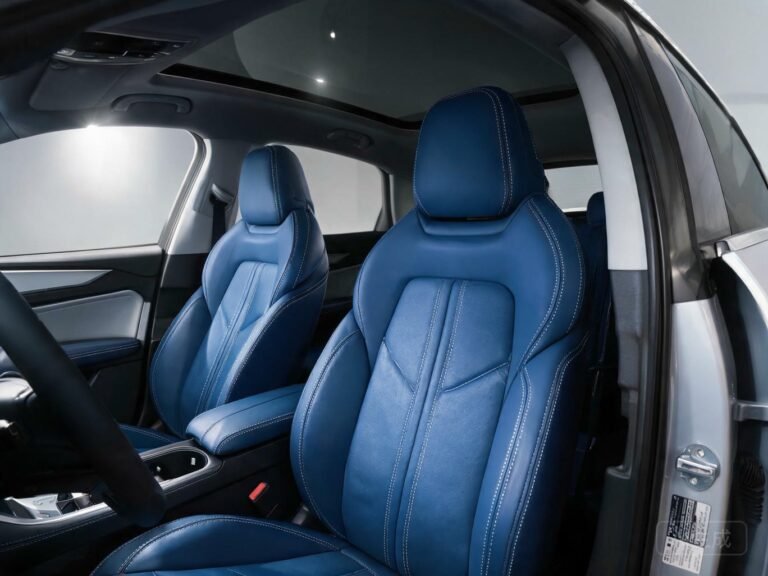
Modern automotive interiors use silicone leather seats that resist cracking and UV damage — eliminating the need for seat patches entirely.
In our experience working with automotive OEMs and tier-1 suppliers, the warranty cost difference alone can justify the material upgrade. One electric vehicle manufacturer documented a 70% reduction in seat-related warranty claims after switching from PU to silicone leather on their premium trim line — primarily because bolster cracking and UV fading, the two most common seat failure modes, were essentially eliminated. This aligns with broader automotive interior trends toward longer-lasting, lower-VOC materials.

Tensile strength testing — silicone leather’s high elongation at break (250-300%) and tear strength (15-20 N) prevent the crack propagation that makes seat patches necessary.
Automotive certification overview — how silicone leather meets FMVSS 302 flame retardancy and VDA 277 VOC standards for car interiors.
Leather Seat Patch: When You Still Need to Repair
If you’re working with existing seats that need repair, follow these guidelines to maximize patch longevity — even if the material underneath is PU or PVC:
- Use heat-activated adhesive, not pressure-sensitive. Pressure-sensitive adhesives (the peel-and-stick type) are designed for room-temperature use and fail rapidly in hot car interiors.
- Round the patch corners. Sharp corners create stress concentration points that start peeling first. A 5mm radius on all corners significantly reduces edge lift.
- Apply to a clean, abraded surface. Lightly scuff the area around the damage with fine sandpaper to create mechanical tooth for the adhesive, then thoroughly degrease with isopropyl alcohol.
- Use a backing fabric for tears. A piece of canvas or fiberglass mesh inserted behind the tear distributes stress across a larger area and prevents the crack from propagating.
- Match the grain direction. If the seat has a grain pattern, align the patch grain with the original. Mismatched grain is the #1 reason “invisible” patches are actually visible.
Frequently Asked Questions
Can leather seat patches withstand car interior temperatures?
Most self-adhesive leather seat patches can’t. Pressure-sensitive adhesives typically have a service temperature range of -20°C to 50°C, but car seats in direct sun can reach 70°C (158°F). At those temperatures, the adhesive softens and loses bond strength, causing the patch to slide, bubble, or peel at the edges. Heat-activated adhesives used in professional repairs have a higher temperature range (typically up to 80-100°C) and perform better, but even these eventually fail due to flex fatigue and UV degradation of the patch material itself.
What’s the difference between a seat patch and a seat cover?
A seat patch is a small, adhesive-backed material applied directly over a damaged area — typically a few inches across. It’s designed to be invisible or minimally visible. A seat cover is a separate fabric or neoprene sleeve that fits over the entire seat, providing full coverage but changing the seat’s look and feel. For OEM and fleet applications, neither is ideal: patches fail quickly, and seat covers interfere with airbags and seat sensors. Specifying a more durable material from the start eliminates the need for both.
Patching Is a Symptom, Not a Solution
A leather seat patch is always a band-aid. It treats the symptom — a cracked or torn seat — without addressing why the seat cracked in the first place. For PU and PVC leather seats, cracking and fading are inevitable because UV radiation and heat break down the material’s polymer structure. The only way to avoid the patch cycle is to specify a material that doesn’t degrade under automotive conditions. Silicone leather’s inherent UV stability, temperature resistance, and flex endurance mean seats that still look new at year five — and warranty departments that process 70% fewer seat-related claims. The patch kit industry exists because most seat materials aren’t designed to last. The question is whether you want to keep buying patches, or specify the right material from the beginning.
About TOPSUN
TOPSUN supplies silicone leather for automotive seat and interior applications where UV resistance, temperature stability, and flex endurance eliminate the need for patching and reupholstery.
FMVSS 302 flame retardant · VDA 277 low VOC · 50,000–100,000 flex cycles · -40°C to 250°C stable · 10+ year service life